Create and Print QR Labels for Goods Receipt
In this documentation, the step-by-step process of creating QR labels to facilitate product identification and inventory tracking immediately after goods receipt is explained with visuals.

 Rabia Demir
|
Rabia Demir
|
Create and Print QR Labels for Goods Receipt
The primary purpose of applying labels or barcodes to products after goods receipt is to facilitate inventory tracking and ensure accuracy and traceability. For this reason, labels are the most important tool for simplifying product identification. With SAP, you can seamlessly generate printouts in a custom-designed label format from your system immediately after the goods receipt process and identify your materials.
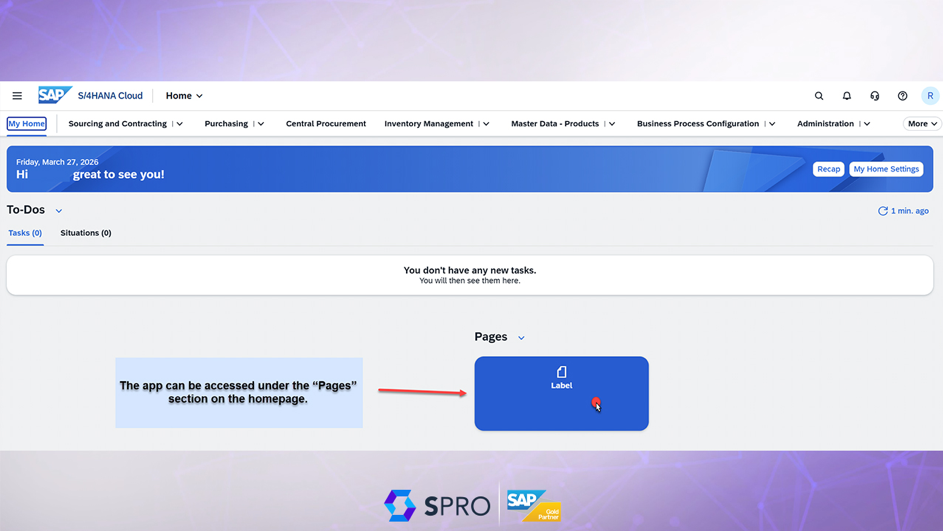
This product will appear as shown in the image if you have the appropriate role on your home screen. You can access the screen where the action will be performed by clicking on the application area.
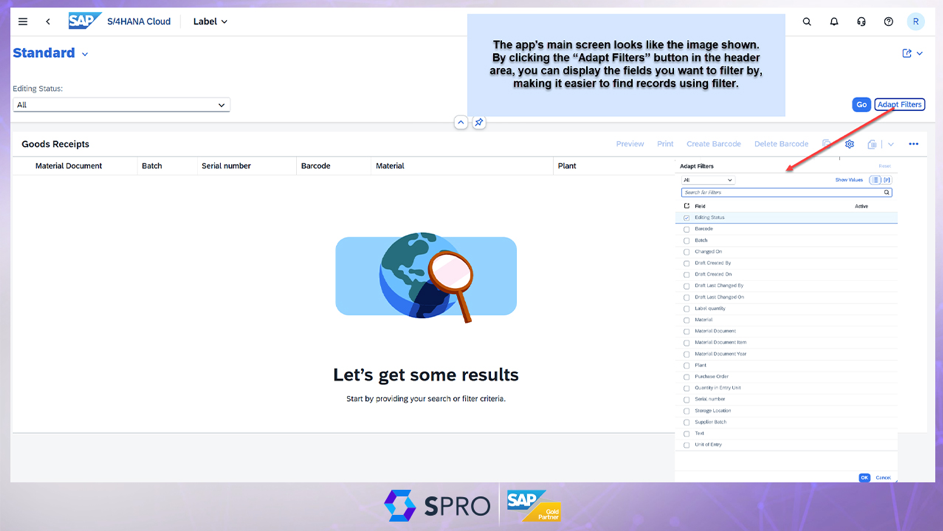
The application’s main screen provides filtering options to help you work with your data. For example, if you have a specific purchase order, batch, serial number, material, or material document, you can filter by these fields to find the record you’re looking for. To do this, use the “Adapt Filters” button on the screen. You can filter using the relevant fields here as needed. Alternatively, the screen can be run without applying any filters.
To retrieve the relevant records, click the “Go” button.
Once the records appear on the screen, it will look as shown in the image. This screen displays both records for which barcodes have already been generated and records awaiting barcode generation. The columns displayed on the screen will appear as shown in the image by default, but the screen layout can be customized as needed.
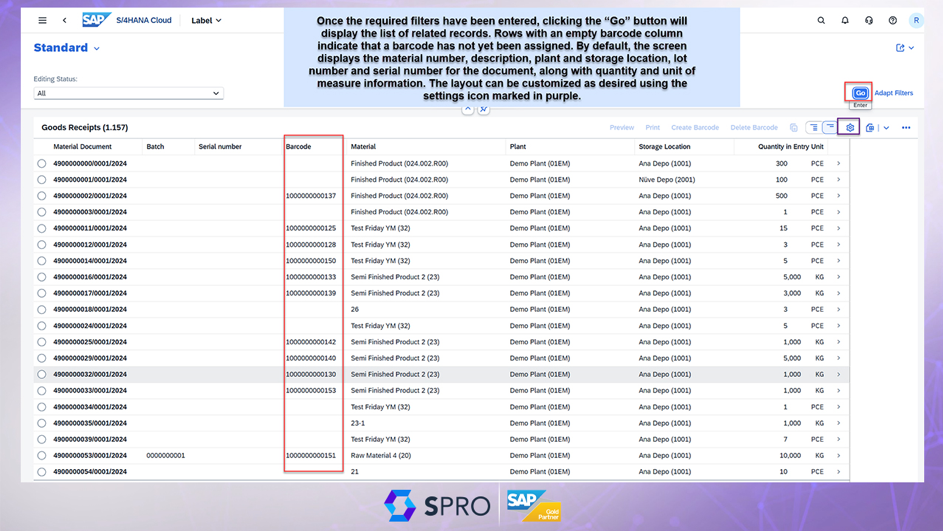
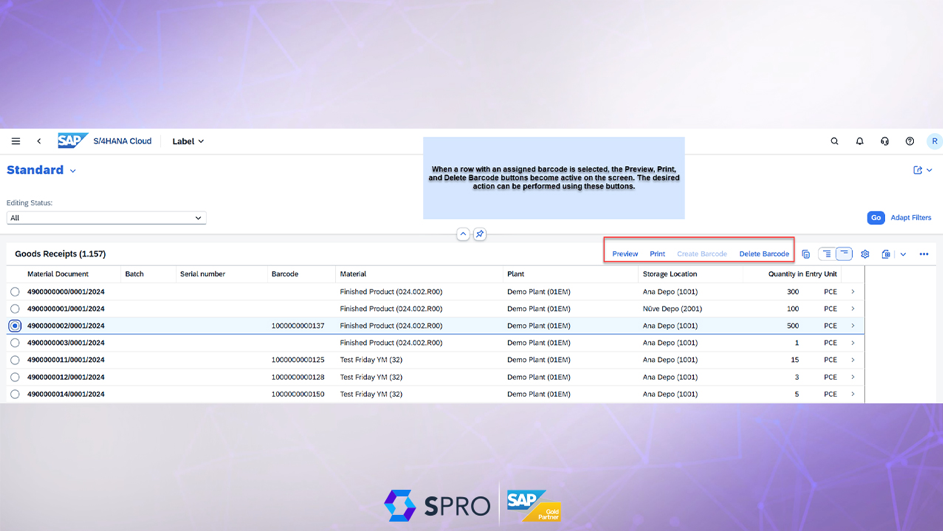
The action buttons for records with assigned and unassigned barcodes listed on the screen become available for the selected row. For example, since a barcode cannot be created again for a record that already has one, the “Create Barcode” button is disabled. If you want to create a new barcode, you must first delete the existing one and then create a new one.
You can view the barcode image for a record with a barcode number either by clicking the “Preview” button on the main screen or by navigating to the row details.
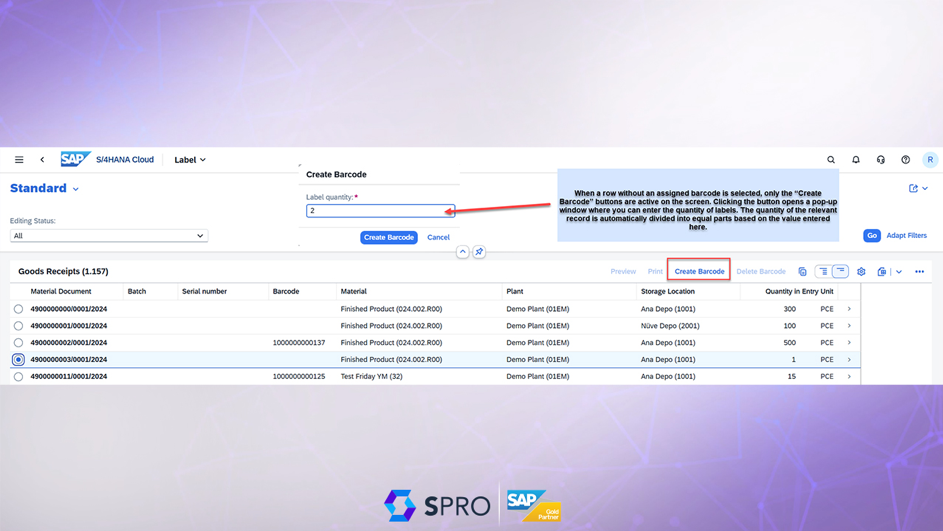
Since the only action that can be performed on a row without a barcode is to create one, only the “Create Barcode” button appears as active. When this button is clicked, a pop-up window appears on the screen. This window allows you to specify the quantity for the label you wish to create.
For example, if the data in the selected row shows an entry of 10 kg, entering the value 2 in the pop-up window will cause the system to automatically divide the quantity equally, creating two labels, each with a quantity of 5 kg.
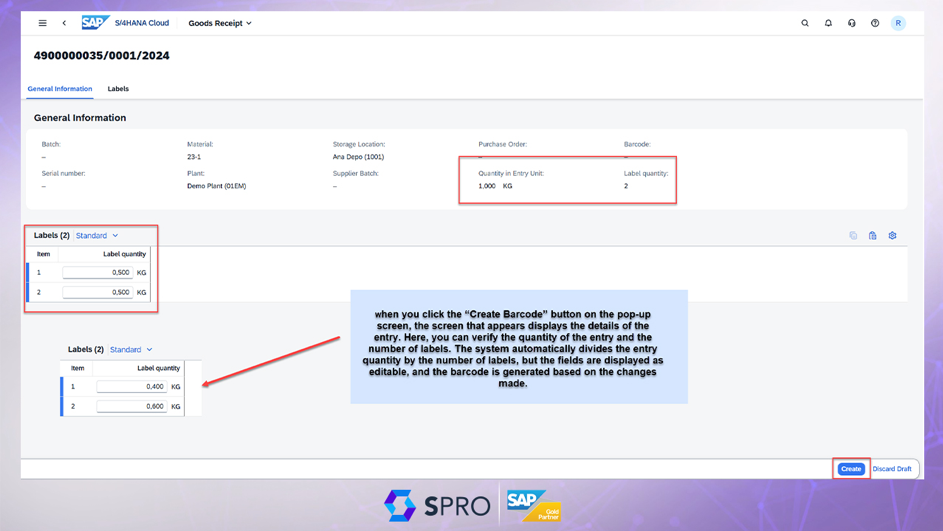
When you click the “Create Barcode” button on the pop-up screen, the system automatically redirects you to the screen shown in the image. This screen displays the detailed information for the label that will be generated. As shown in the example above, the label quantities appear automatically on the screen as depicted in the image. However, these fields can be customized as needed. For example, instead of 5 kg each, the labels can be created as 6 kg and 4 kg.
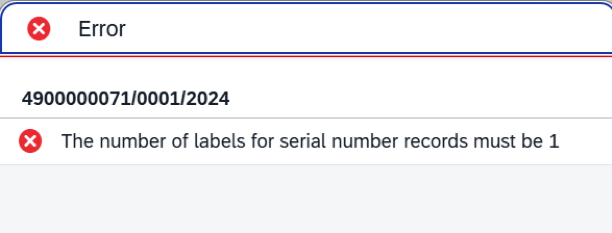
If the item in the selected record row is tracked by serial number, the default quantity for labels in the pop-up window that appears after clicking the “Create Barcode” button is set to 1. If this value is changed, an error message appears on the screen as shown in the image. Since there cannot be multiple products with the same serial number for serial-numbered items, only a single barcode is generated.
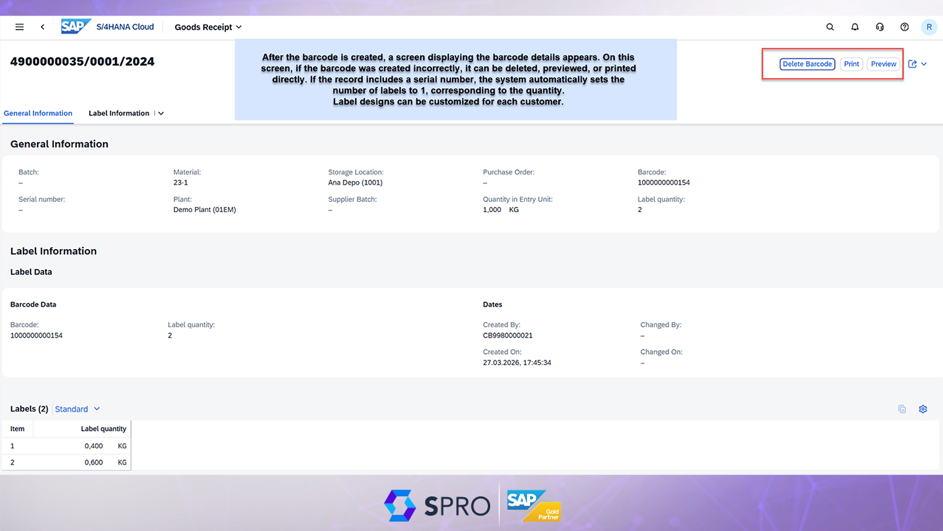
Once the barcode is generated, the screen displaying the barcode details will appear as shown in the image. Here, you can perform various actions related to the generated barcode.
For example, the generated barcode can be viewed; if an error was made, it can be deleted; or it can be printed directly to obtain a physical copy. This allows the barcode to be applied to the item, enabling transactions to be processed both via a handheld terminal and through the system.
If you track your materials in the system using batch numbers or serial numbers, you can display this information on the label in numerical form. If you wish, you can also track the plant and storage location where the goods were received on the label. This is a fully customizable and scalable application.
For this specific product, label designs can be customized for each customer. For example, if different label designs are used for different production sites or company codes, a design can be created to accommodate this; similarly, if certain fields are required to appear on the label under specific conditions, this can also be accommodated in the label design.
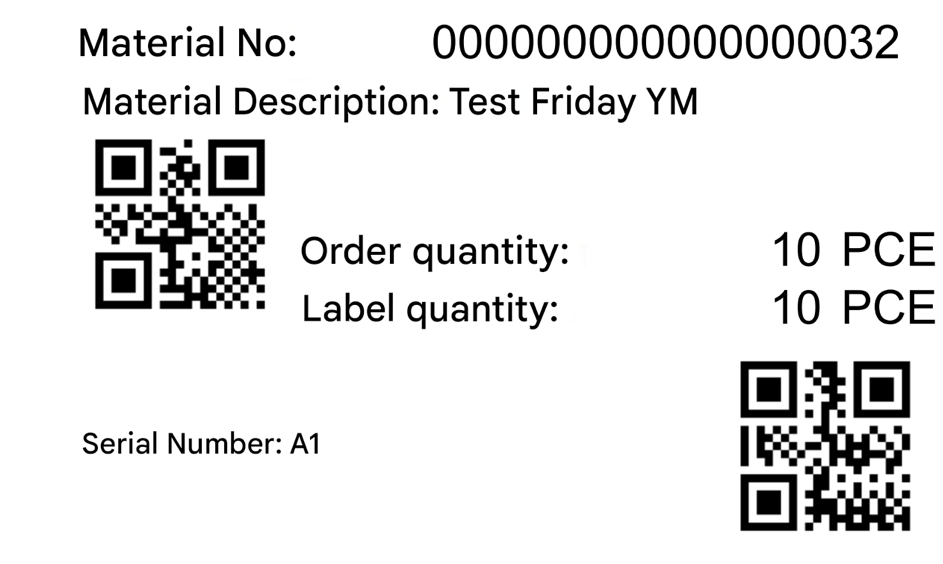
The images below show sample label designs.
Sample label printout for materials without batch and serial number tracking;

Sample label printout for materials tracked by lot number only;
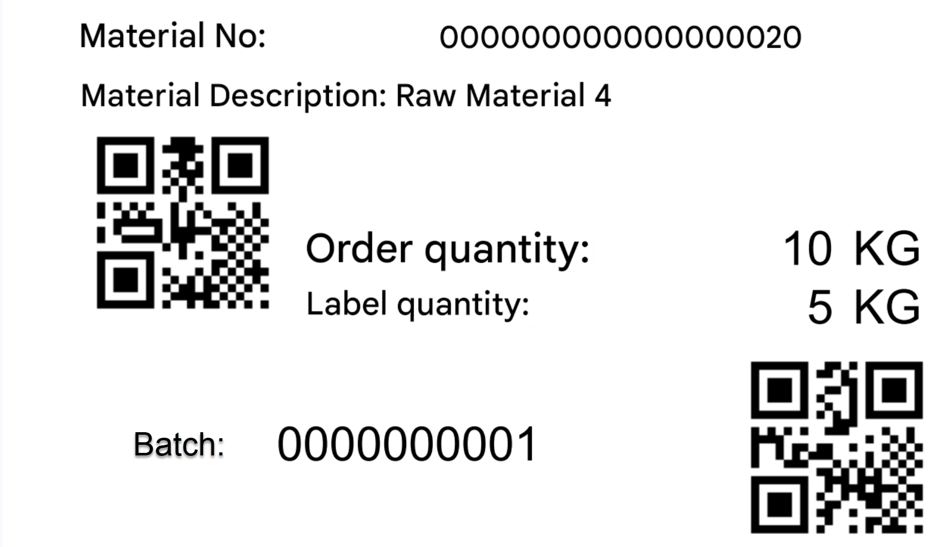
Sample label printout for items with serial number tracking only;