PR Assignment and Processing (ME57 Screen) Documentation
In this documentation, the use of the ME57 screen for PR (Purchase Requisition) Assignment and Processing is explained step-by-step with relevant visuals.

 Gizem Durak
|
Gizem Durak
|
In this documentation, the use of the ME57 screen for PR (Purchase Requisition) Assignment and Processing is explained step-by-step with relevant visuals.
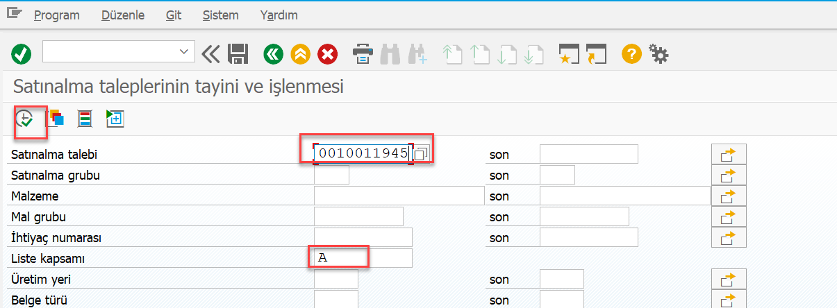
The image of the screen accessed with transaction code ME57 is as follows.
On this screen we can use filters to find relevant purchase requisitions.

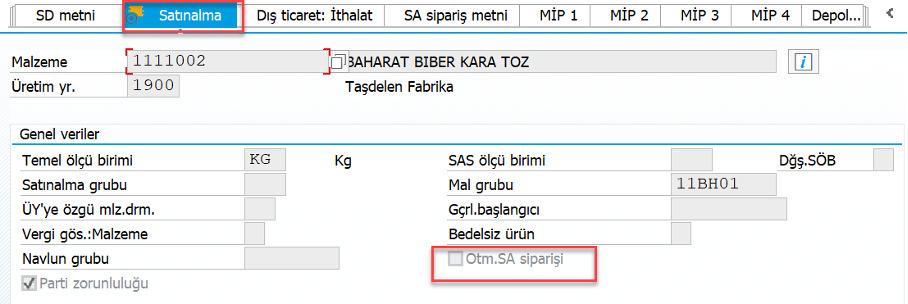
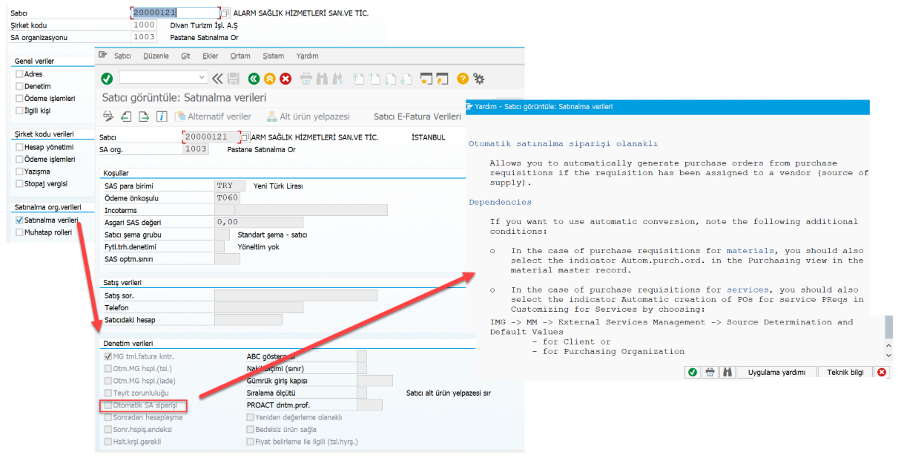
In order to create automatic PO on the ME57 screen, automatic PO maintenance must be performed on the material and vendor data.
In the material data, under the Purchasing tab, the Automatic PO field must be ticked.
In the vendor data, the Automatic PO field must be ticked in the purchasing data.
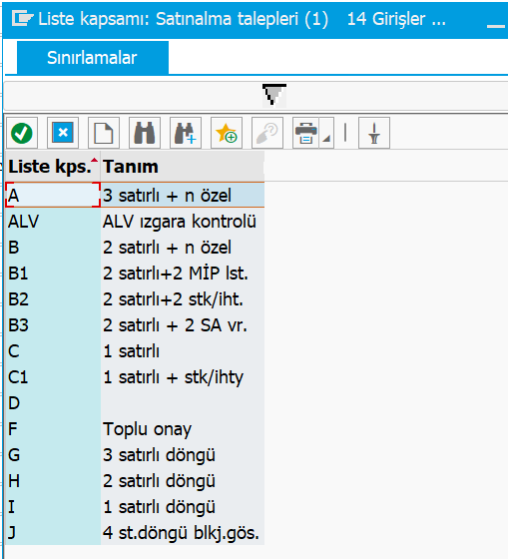
The List scope field is a required field and the options are as follows.
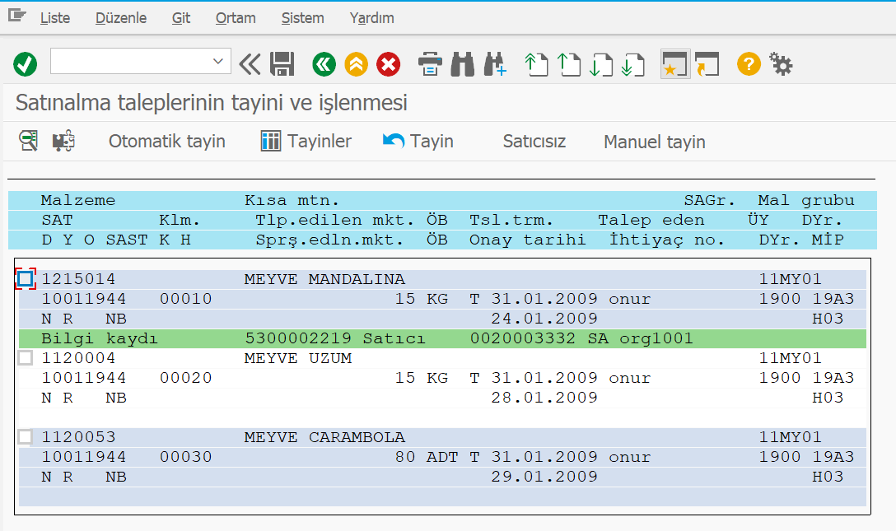
When we continue by selecting A and execute without filtering, the relevant purchase requests are displayed as follows.
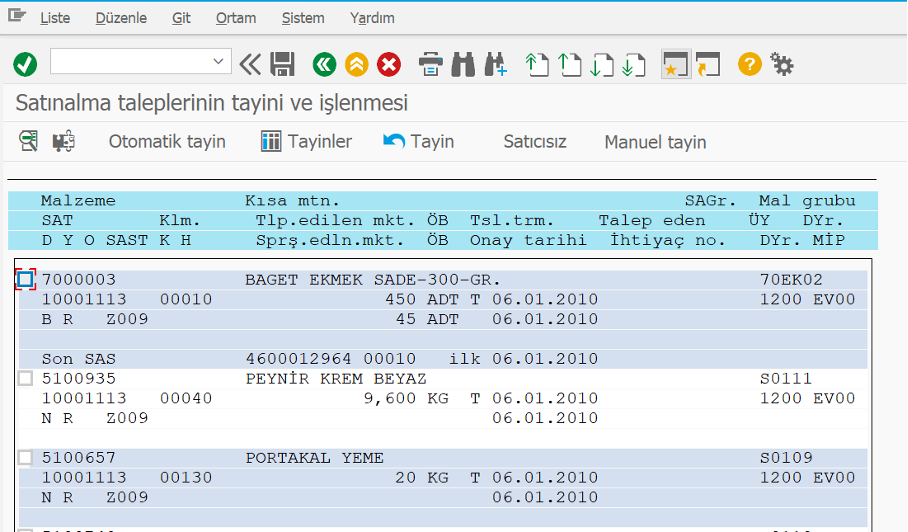
The number of purchase requisitions shown can be reduced by using filters.
You can continue by selecting the relevant pr on this screen. It can be converted to PO by assigning a vendor or information record.
The steps can be explained by translating an example process.
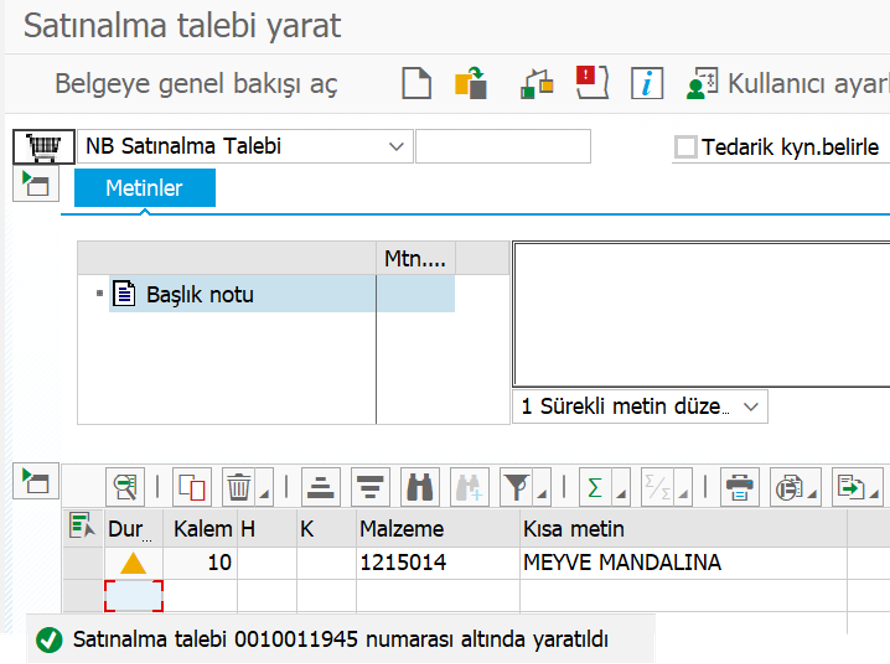
PR is created from the ME51N screen.
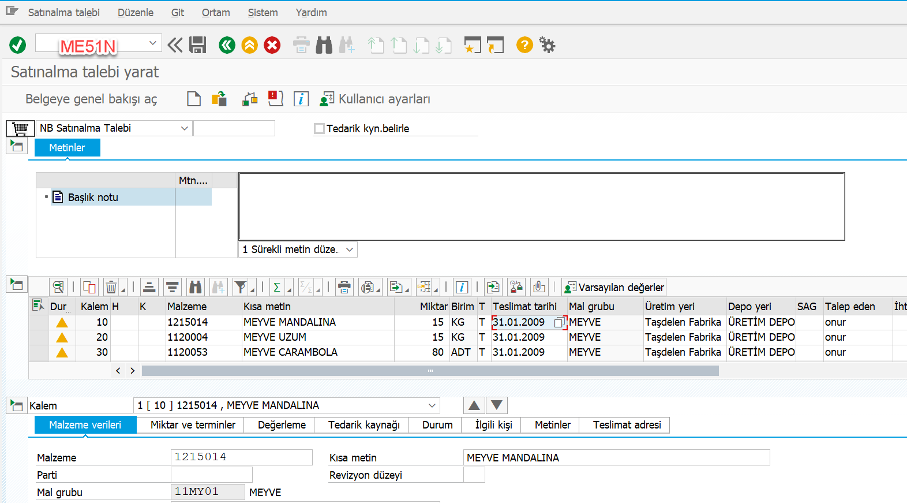
The created PR is saved.
Filtering can be done on the ME57 screen with this PR number.
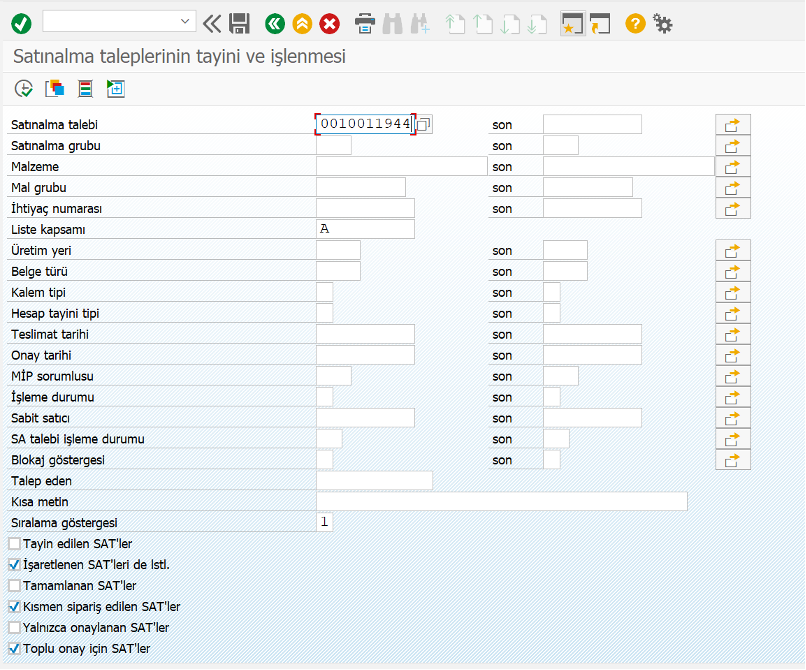
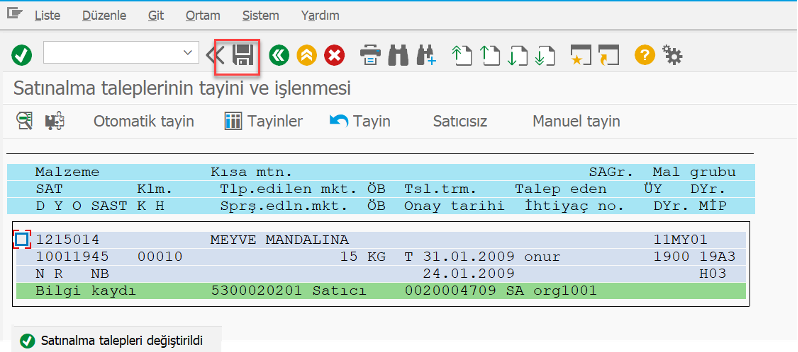
PR lines are displayed by pressing the Execute button.
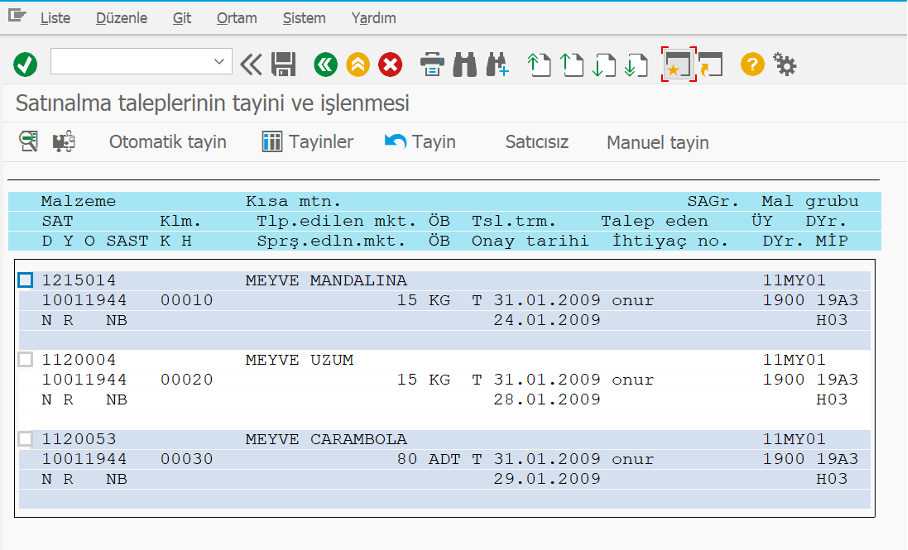
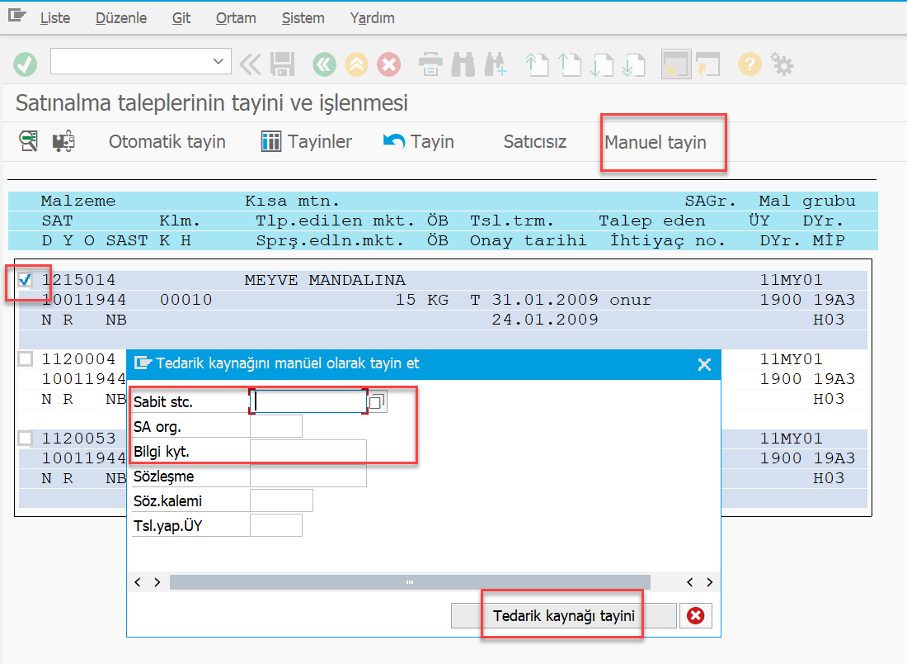
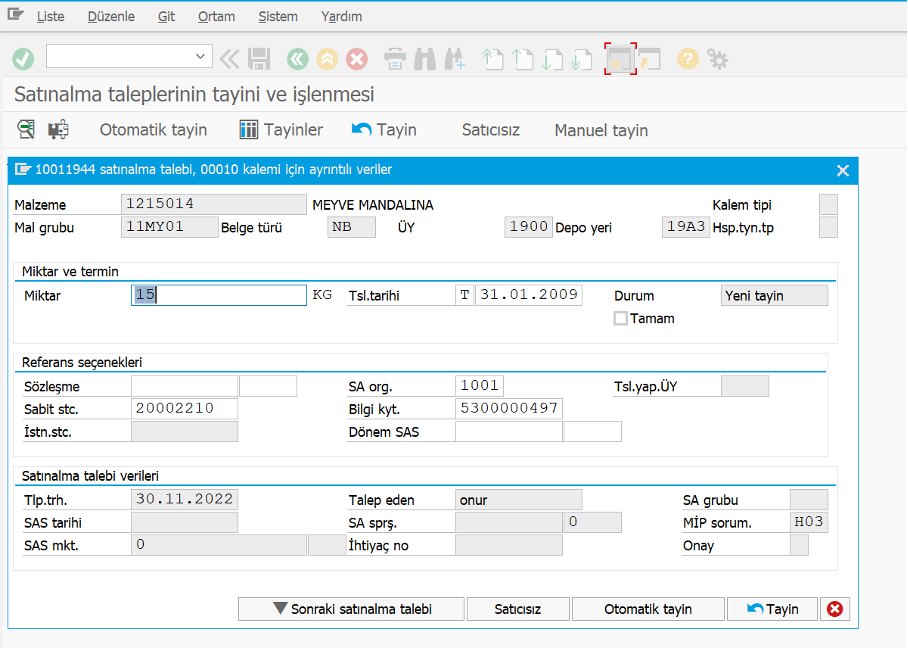
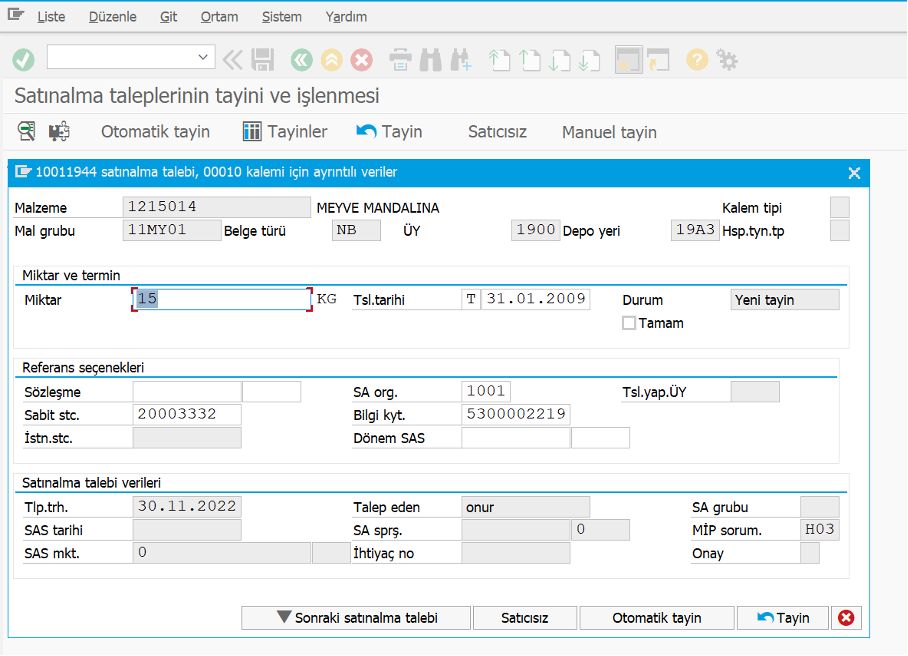
PO can be created after manually assigning the relevant fields by selecting the relevant row and pressing the manual assignment button.
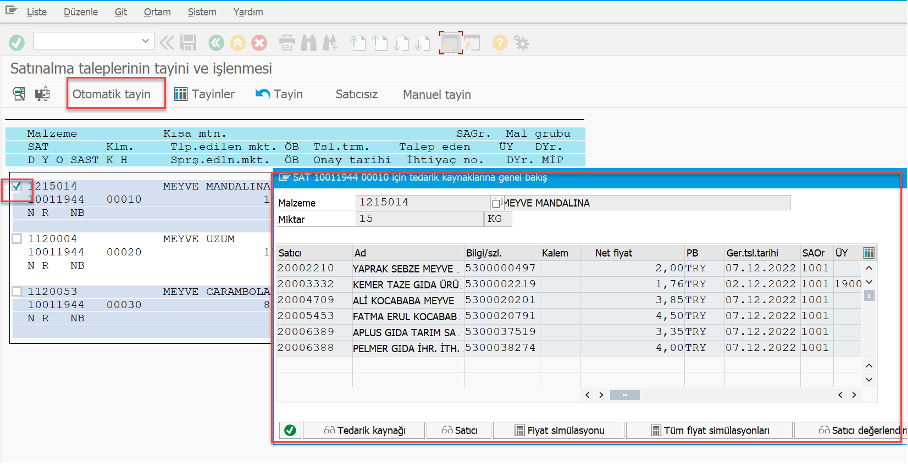
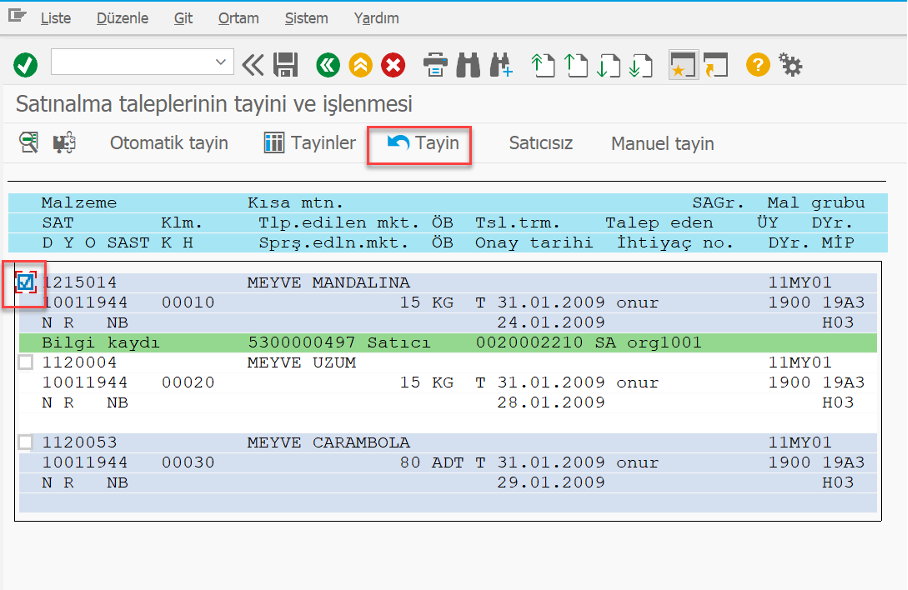
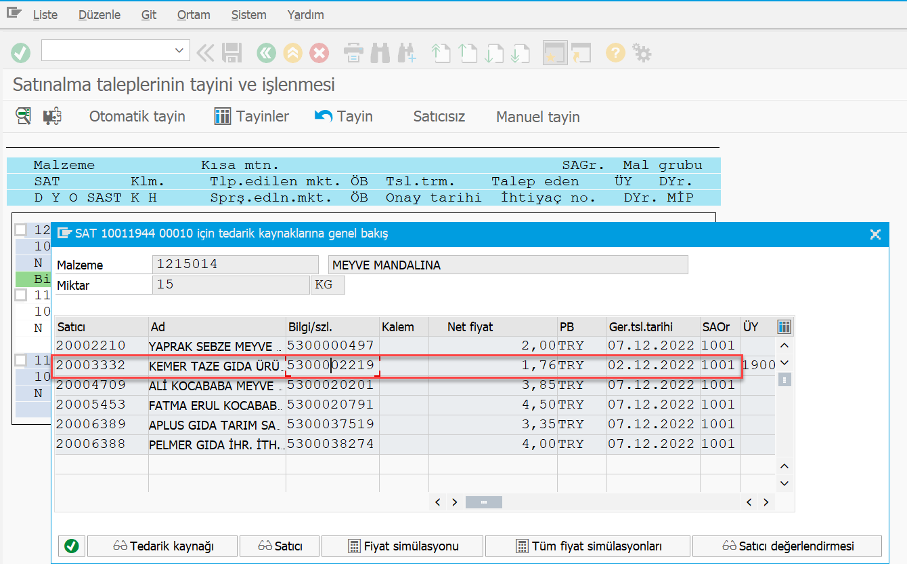
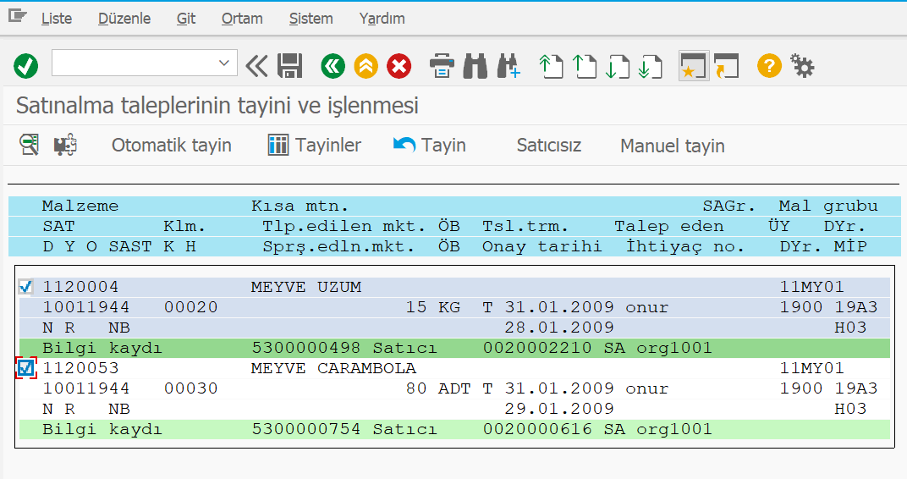
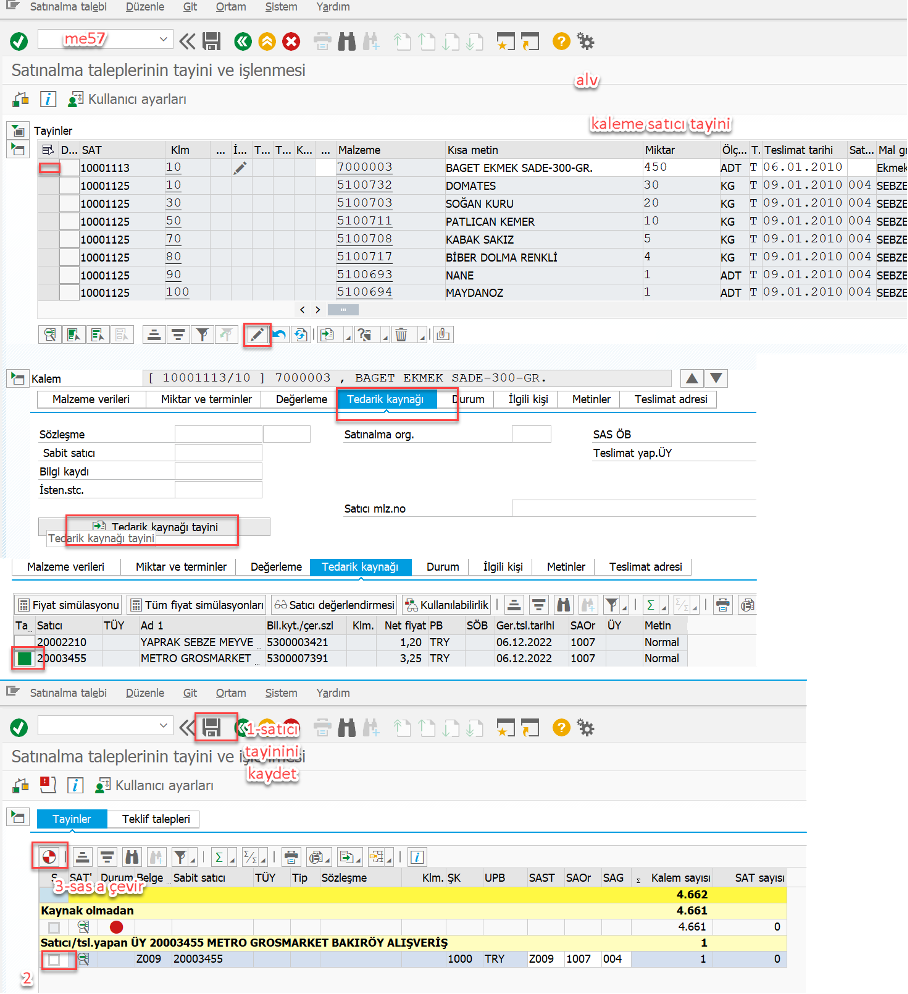
If we select the relevant line and press the automatic assignment button, we can view the relevant vendor options.
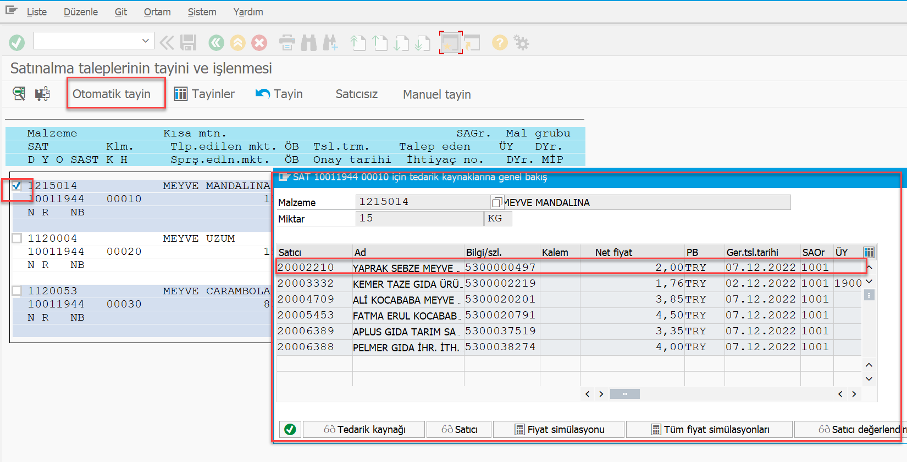
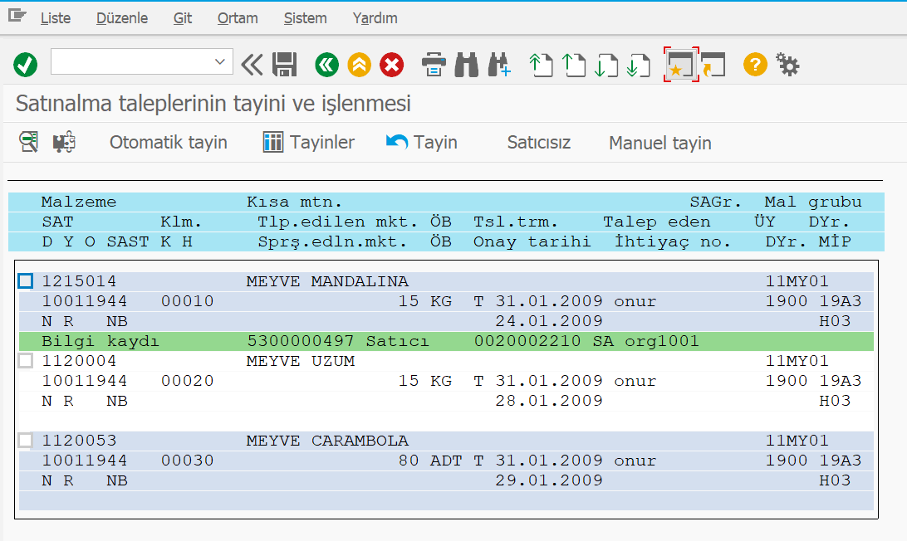
If the row of the vendor to be selected is double-clicked, the assignment of the relevant vendor is made as follows.
Detailed information of the determination made can be viewed with the button with the puzzle symbol.
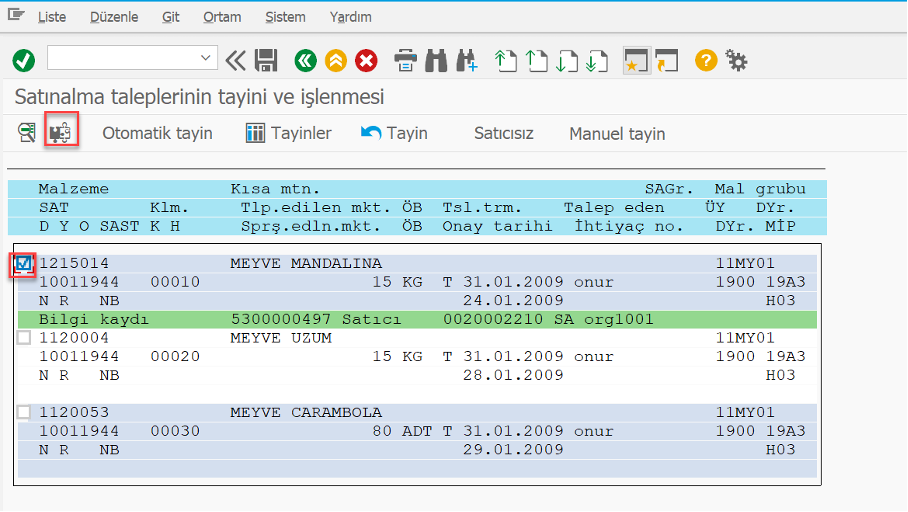
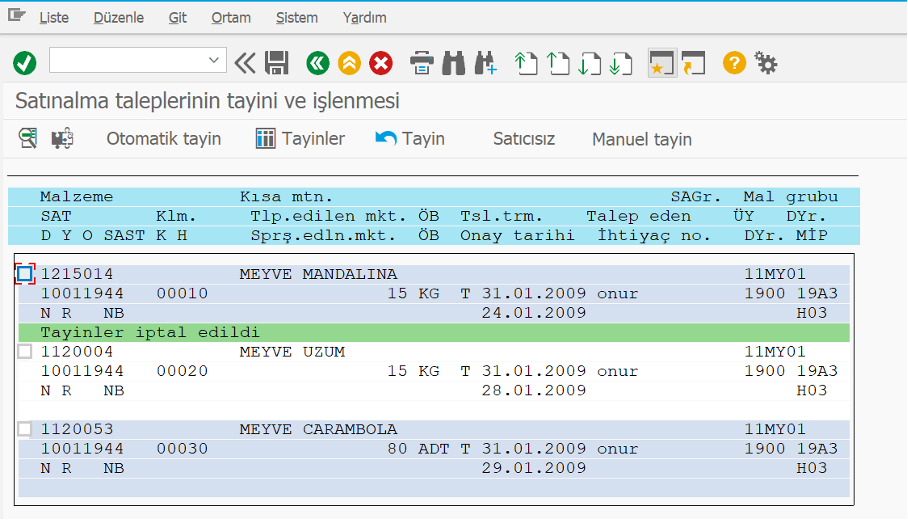
The assignment can be undone by clicking the Undo assignment button.
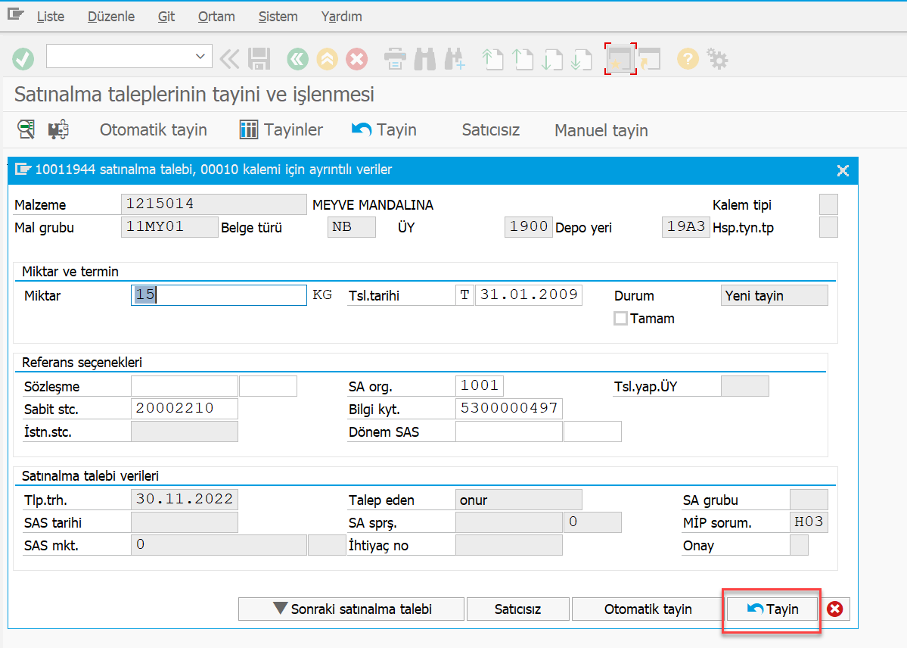
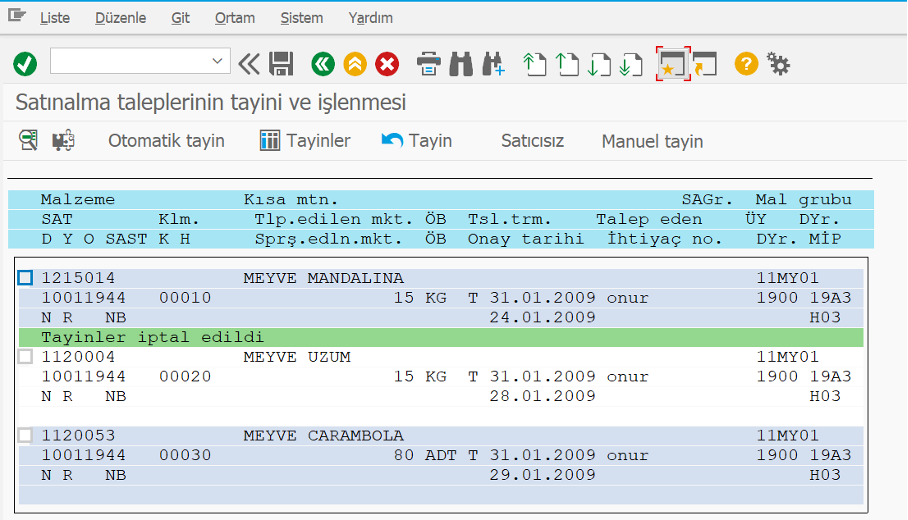
To withdraw the appointment, you can select the relevant line as shown below and press the Undo appointment button, without going into details.
Automatic determination can also be made from the details instead of the main screen. The steps are as follows.
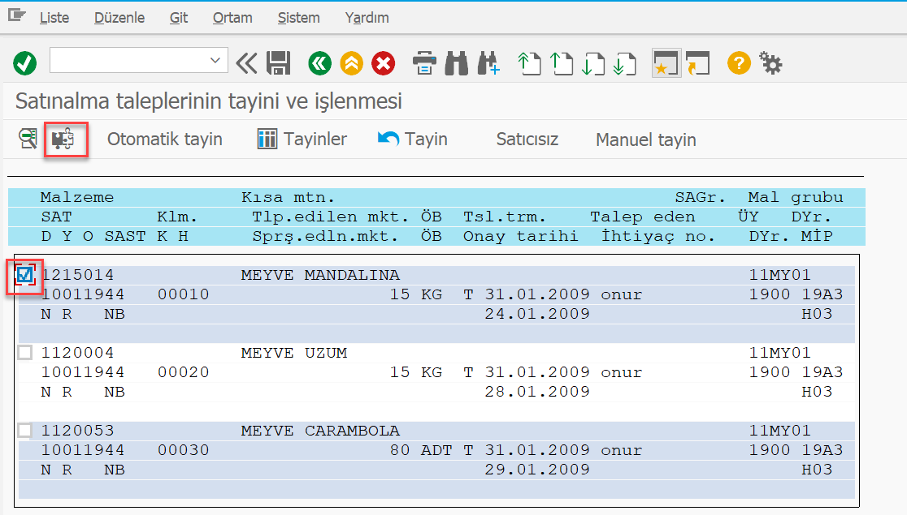
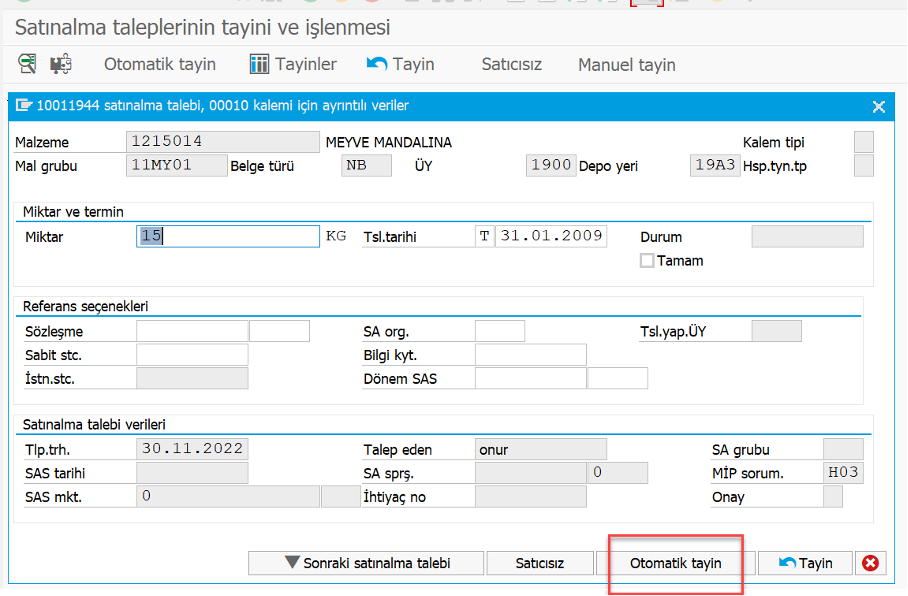
PR can be viewed with the button in the image below and determinations can be saved by pressing the save button.
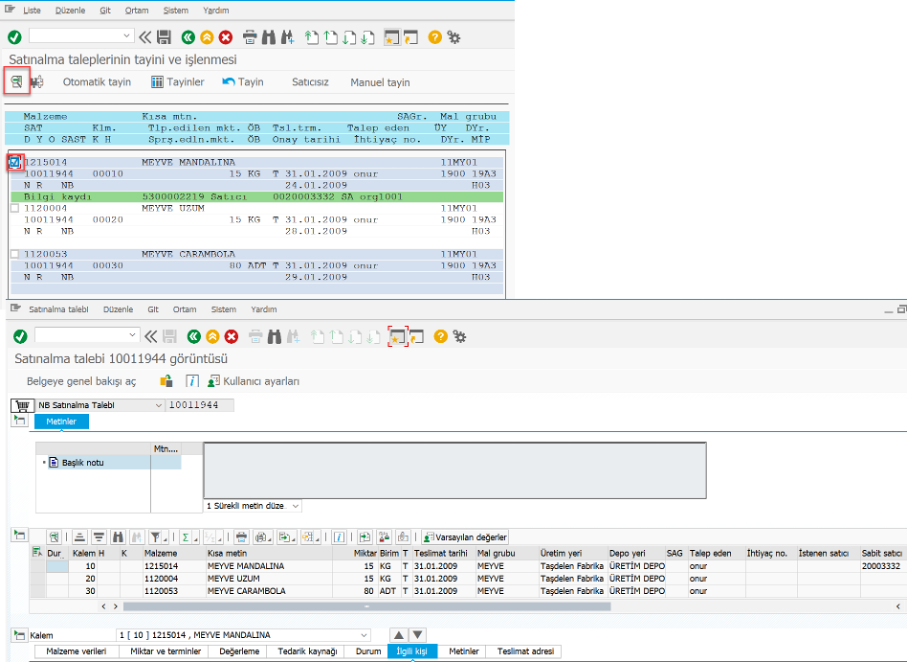
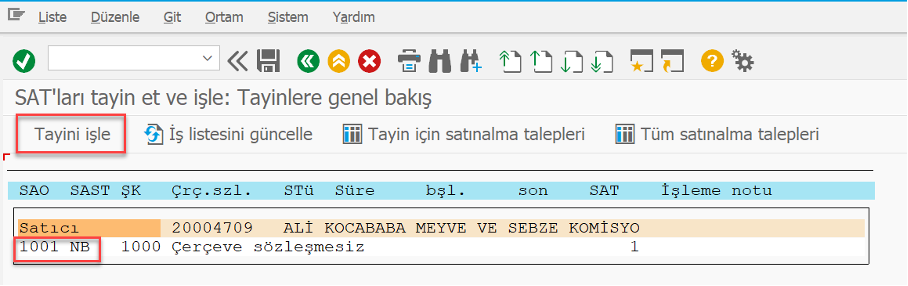
The relevant assignments can be viewed with the Appointments button.
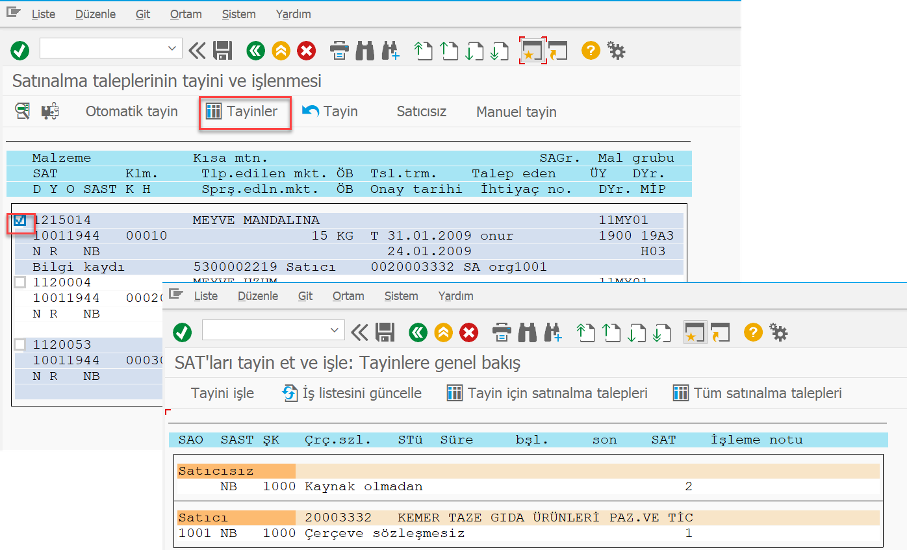
Vendors can be matched with automatic assignment to the other two items.
Changes are saved with the Save button.
Then PO can be created with reference to PR.
After the determination is saved, PO can be saved by going to the ME21N screen via the screen instead of going to it manually.
We can re-examine this process with a new PR.
It can be run with a filter by entering the relevant PR number.
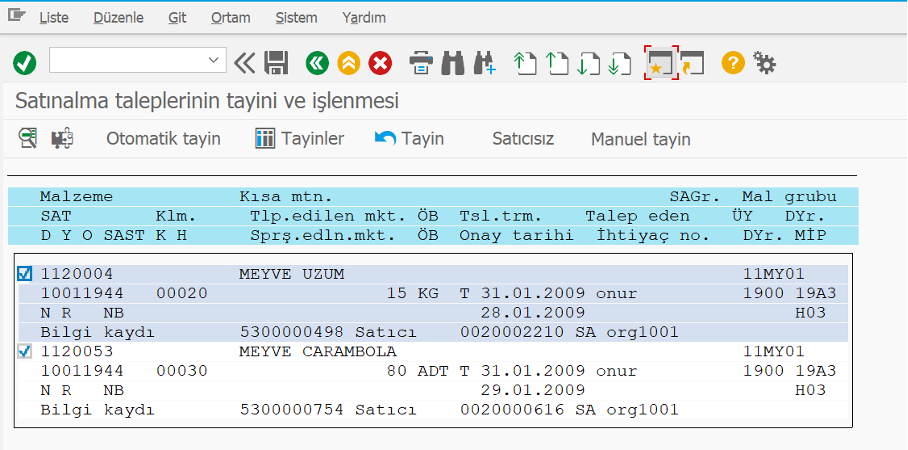
By selecting the relevant line, the desired vendor can be selected with the automatic assignment button.

Changes can be saved with the Save button.
The relevant row can be selected and the assignments button can be pressed.

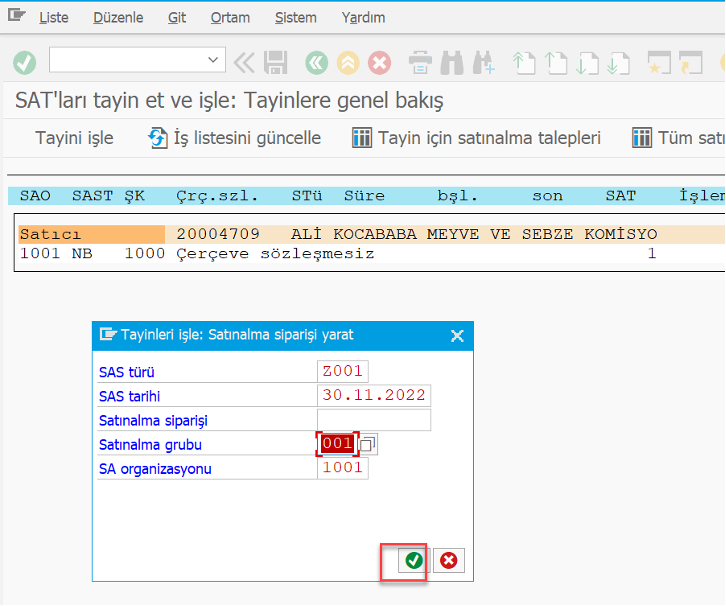
By selecting the relevant line and pressing the process assignment button, the PO creation pop-up appears.
The following information may come automatically and can be changed upon request.
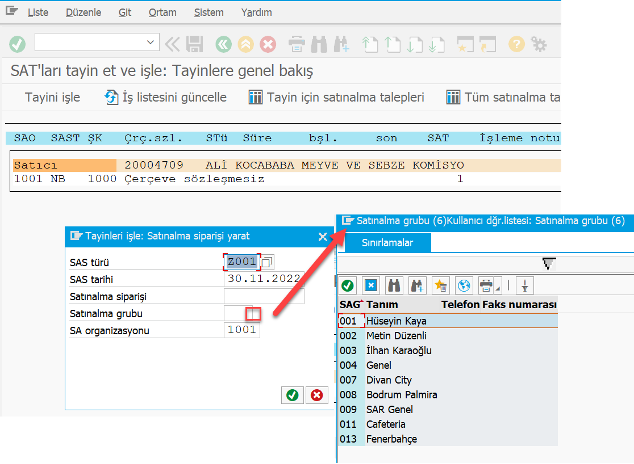
The purchasing group is also selected and continued with the green tick.
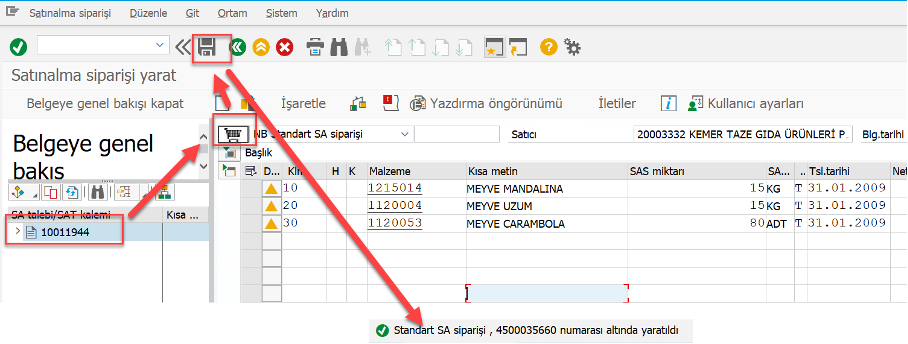
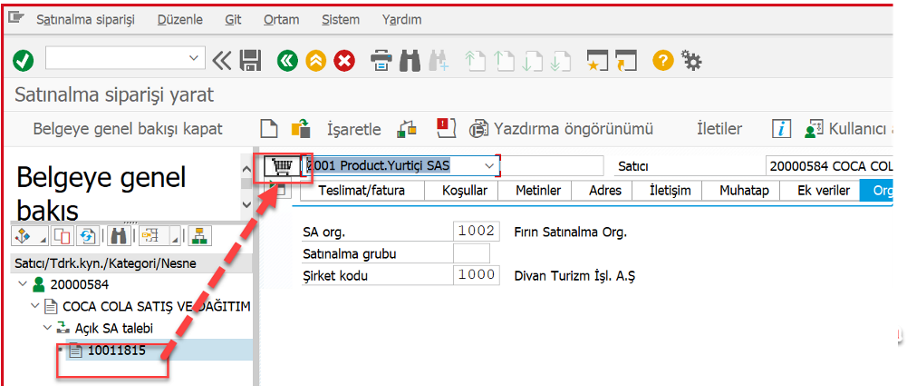
When we press the green tick, the system automatically directs us to the PO creation screen and the relevant PR data is available in the overview on the left.
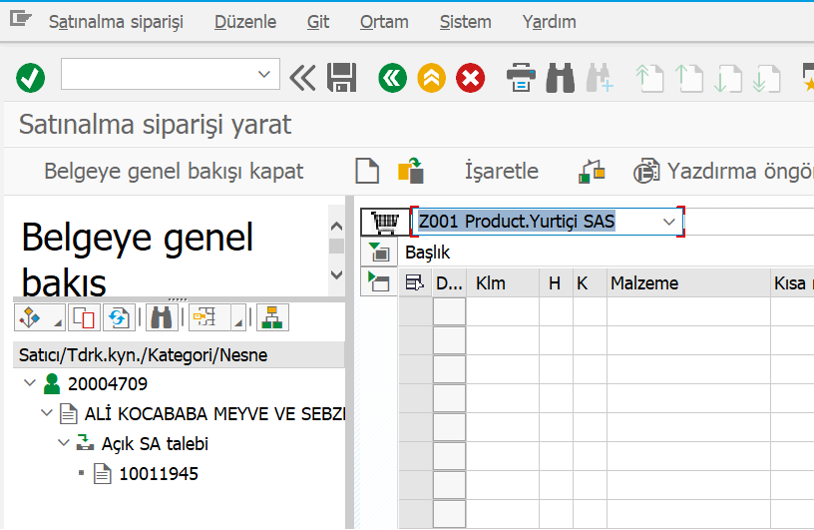
The relevant PR document is held and dragged to the shopping button, then the PO is created by pressing the save button.

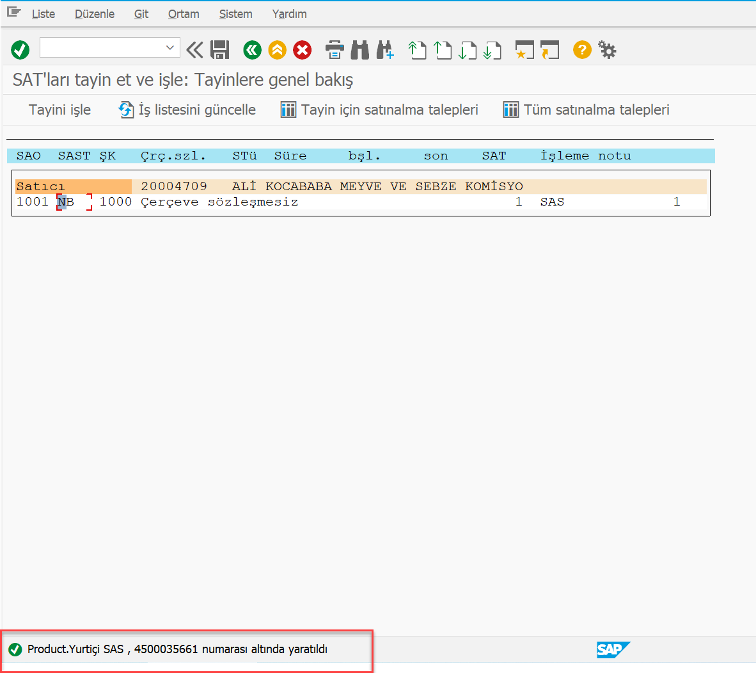
When the Save button is pressed, the system automatically directs us back to the ME57 screen and six lines of PO information can be displayed.
If we go to the previous screen, we can also view the resulting PO data in the relevant PR line.

In this way, PO is created, and the process is completed.
Two important additional pieces of information that may be needed regarding the use of the ME57 Screen are given below.
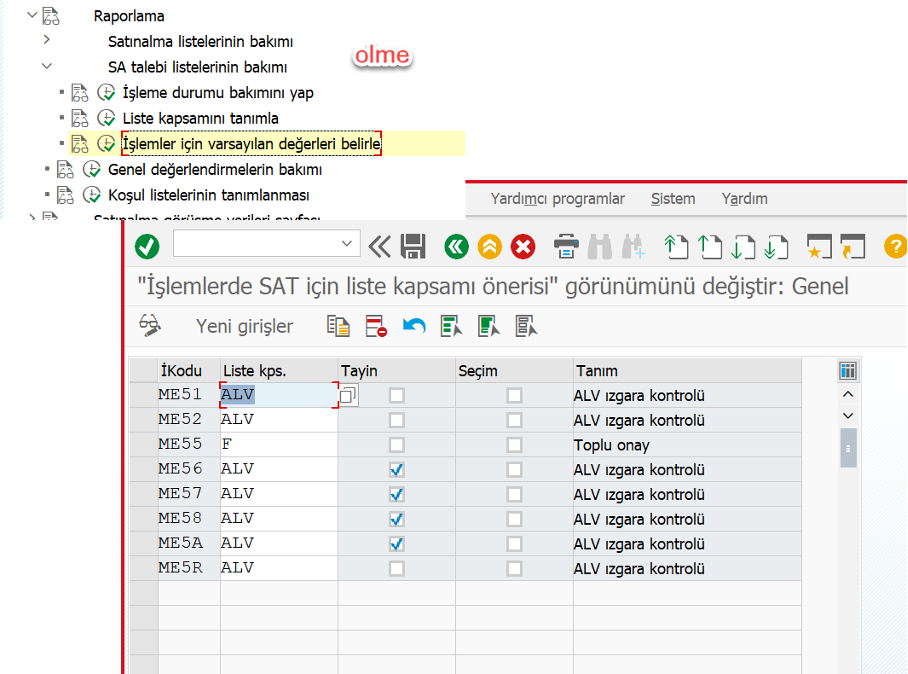
- The adaptation steps to make the ALV option default on the ME57 screen are shown below.
Vendor assignment steps in ALV selection:
- The arrangement required for the PR item to be automatically sent to the basket without being dragged into the basket while creating the PO on the ME57 screen is shown below.
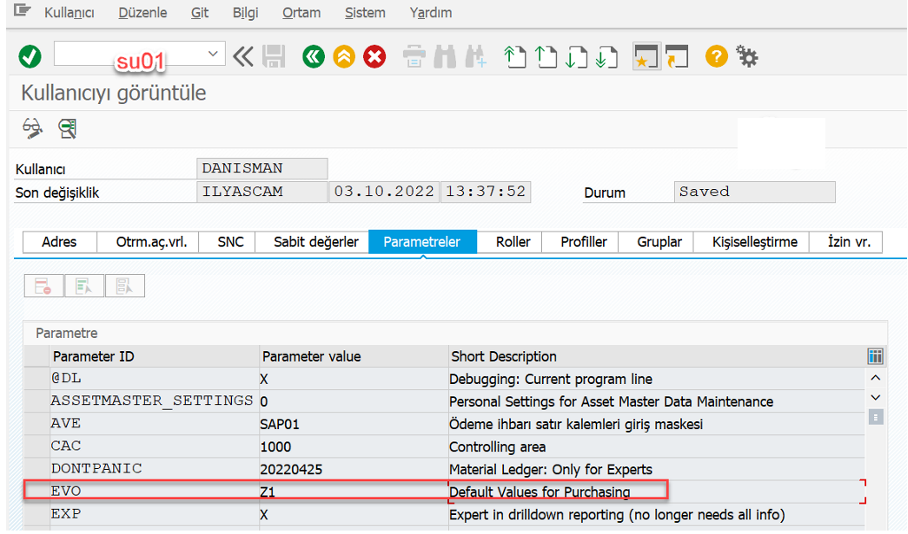
On the SU01 screen, the relevant user must add the EVO parameter and give its value Z1, and after saving, when you exit SAP and enter back again, the line appears automatically on the ME57 screen.
It is important to write Z1 in uppercase.